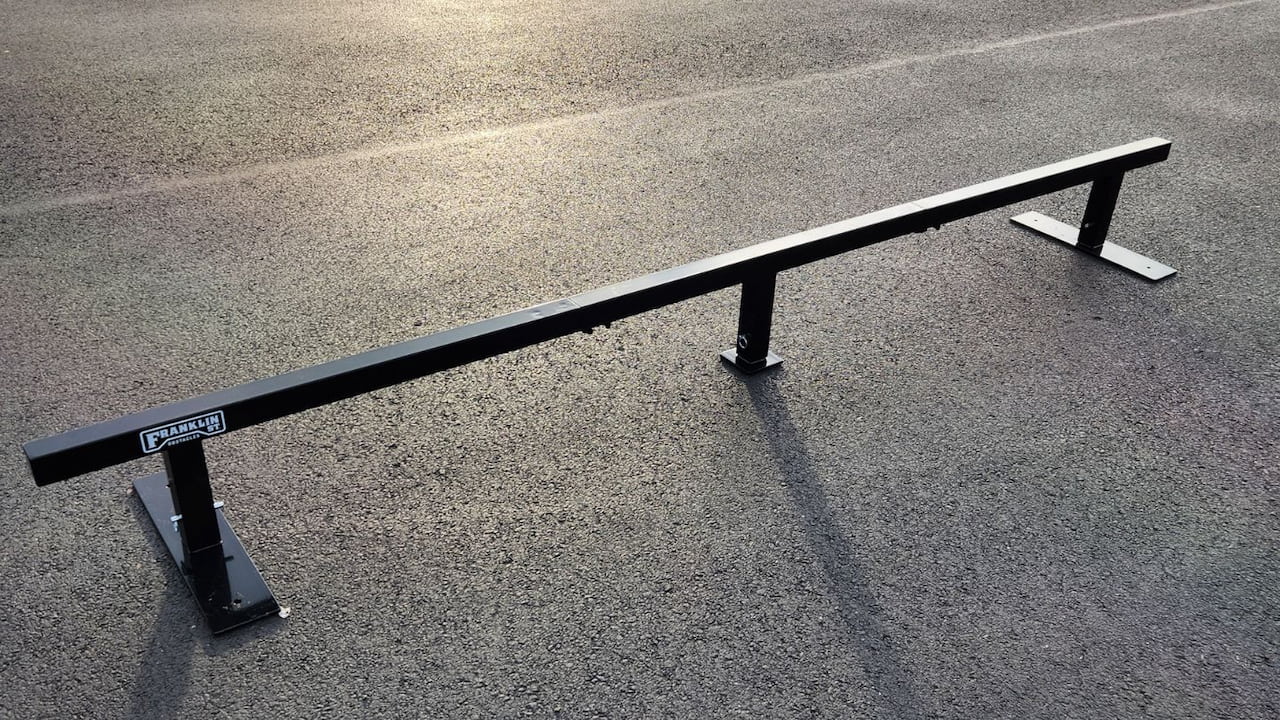
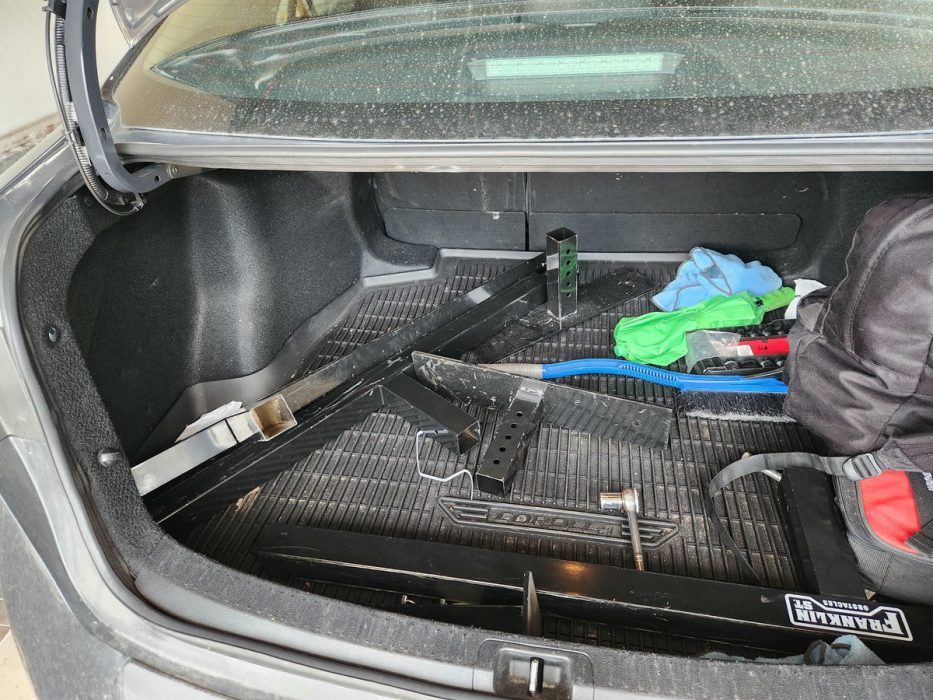
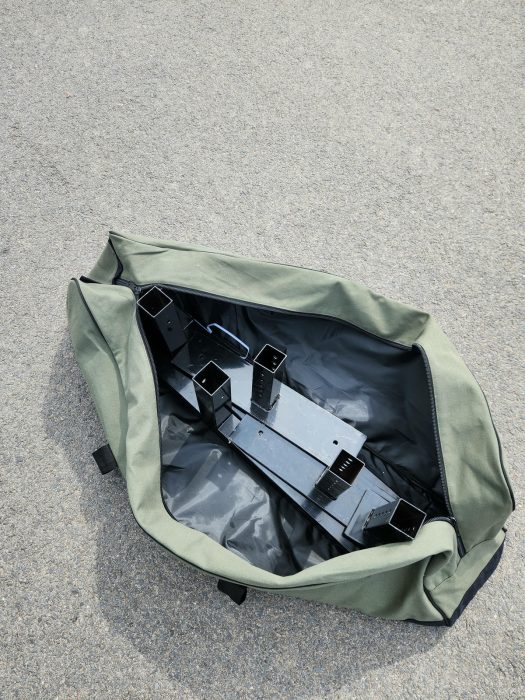
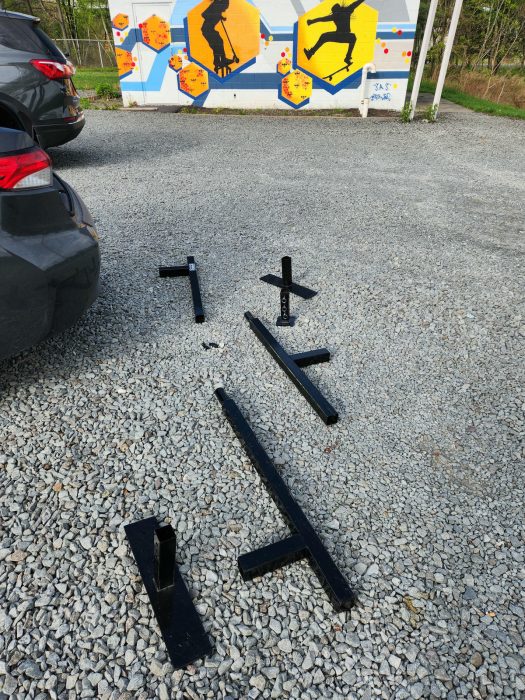
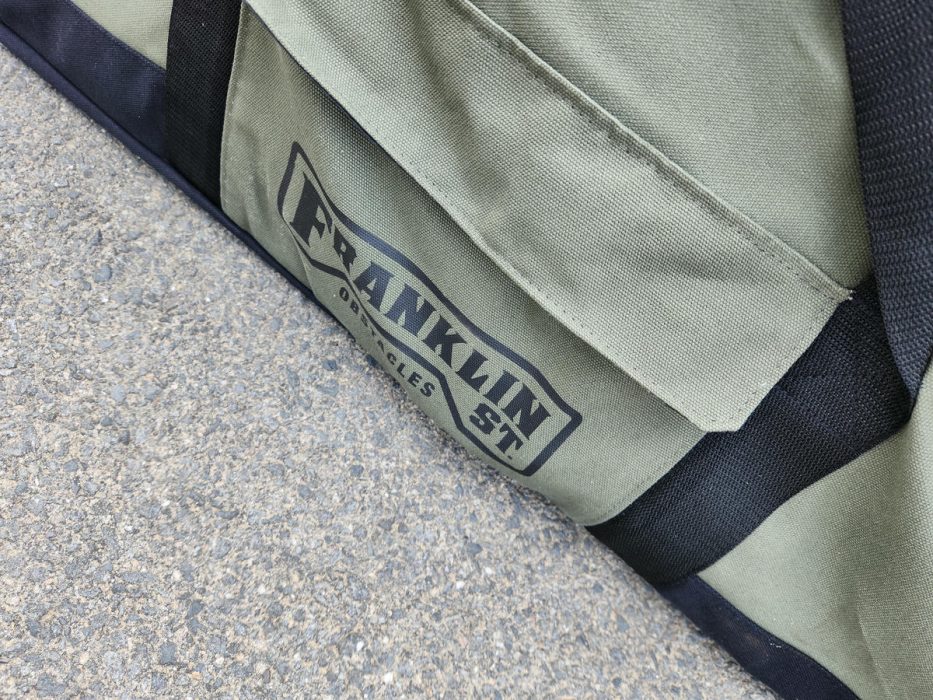
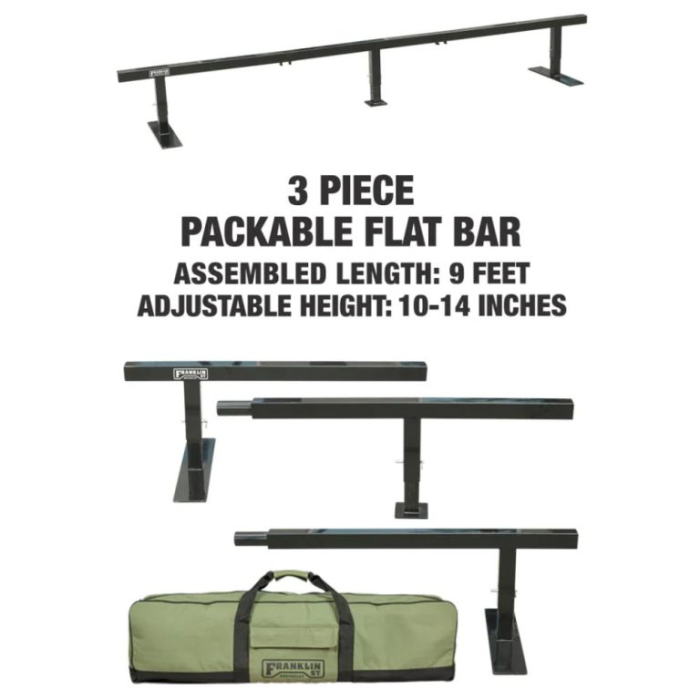
I am always on the hunt for skate obstacles that are portable and durable enough to leave in the trunk of my car, and that led me to want to get the Franklin St 9 foot skate rail. It’s a three piece rail set that that can be built in less than five minutes to become a 9 foot long square flat bar. All of it fits inside a duffle bag they send you with the rail. It sounded so convenient, so I wanted to review it for you here.
First Impression of the Rail & What You Should Know
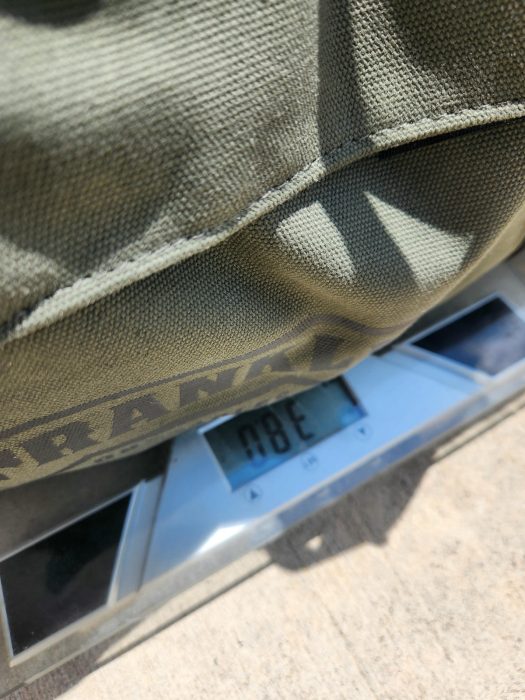
When I first unpacked the Franklin St. 9ft Flat Bar, I was surprised by how lightweight it was. The entire rail is 38 lbs, so you can easily move it yourself when it’s built or in its bag.
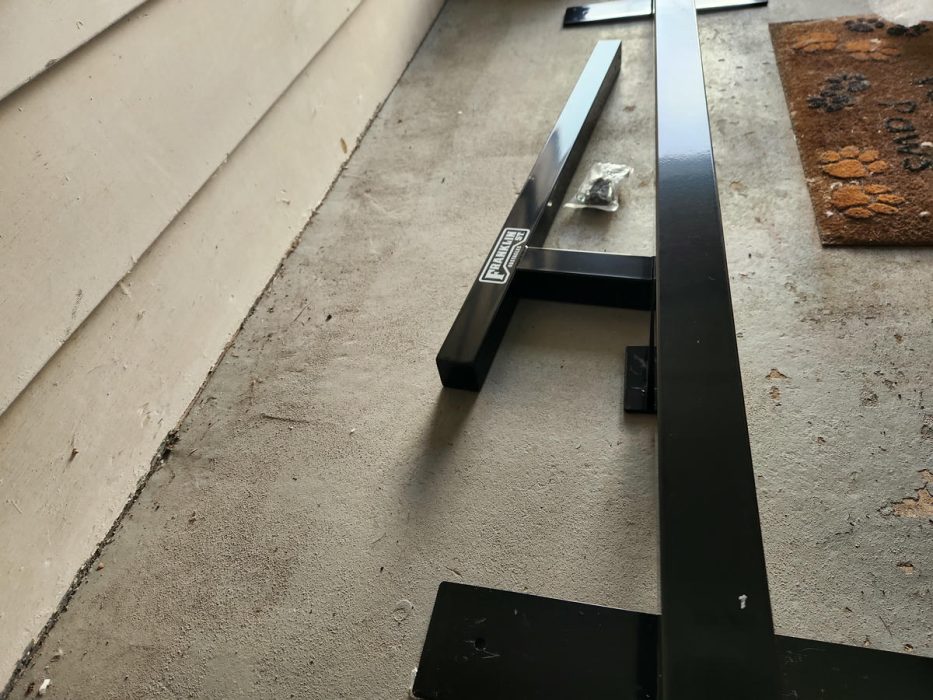
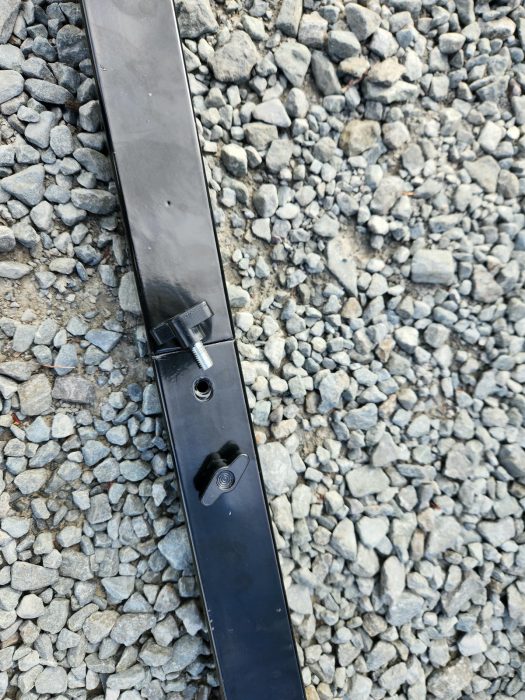
Before taking it to the school by my house, I ran through a quick build setup to see how to do it. The entire build took less than 5 minutes, and it didn’t feel complicated at all. You basically just build it upside down by lining up the rail sections and using the thumbscrews to tighten the outer sections to the center. I describe how to assemble the rail in more detailed steps below here. The outer sections just have two thumbscrews you can tighten and untighten with your fingers, then you put the legs on and adjust them to the proper height with steel ball pins.
I disassembled it, put it in the trunk of my car, and I was off to skate it.
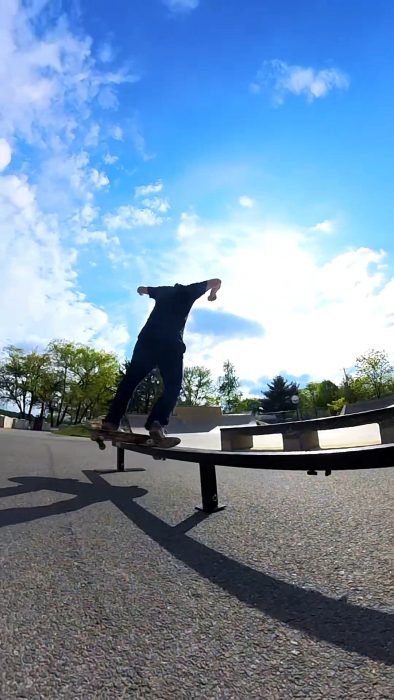
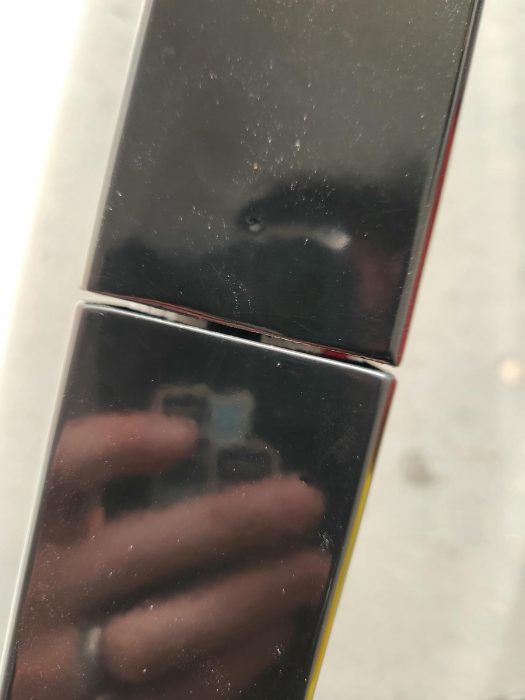
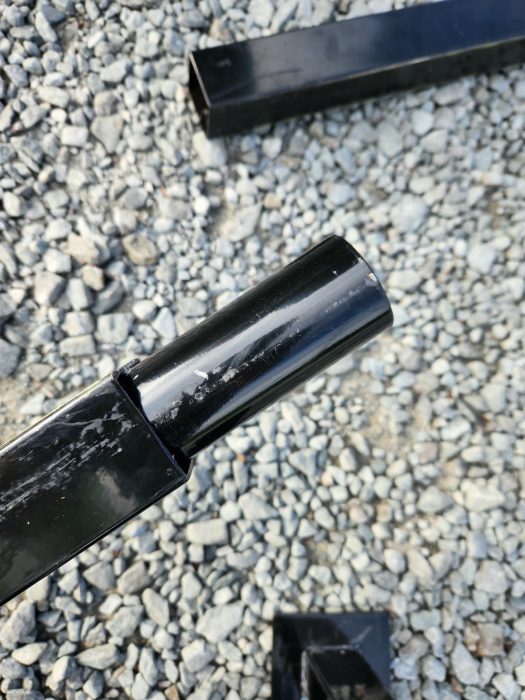
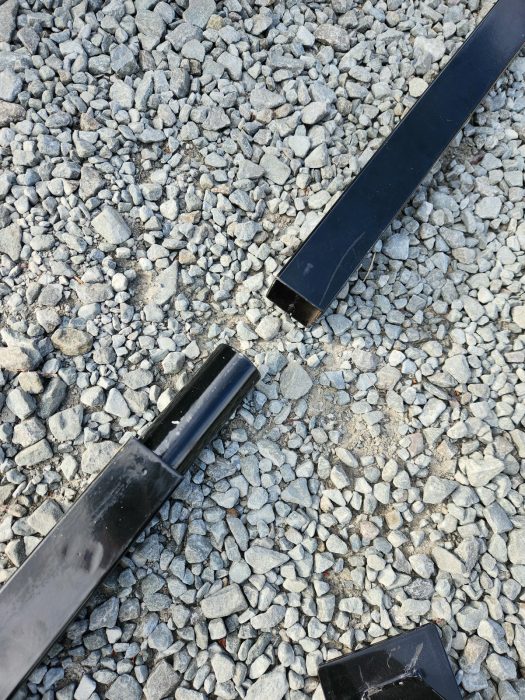
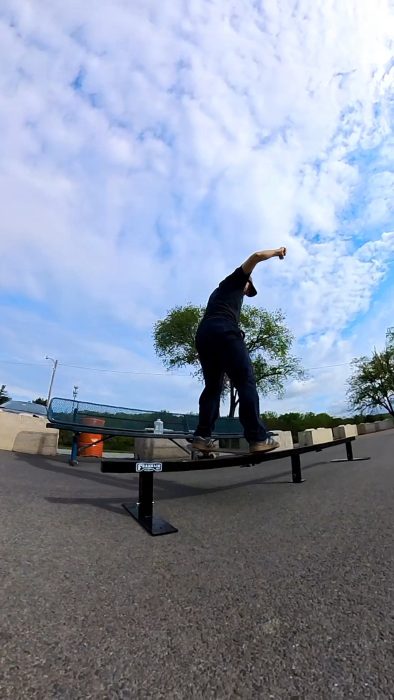
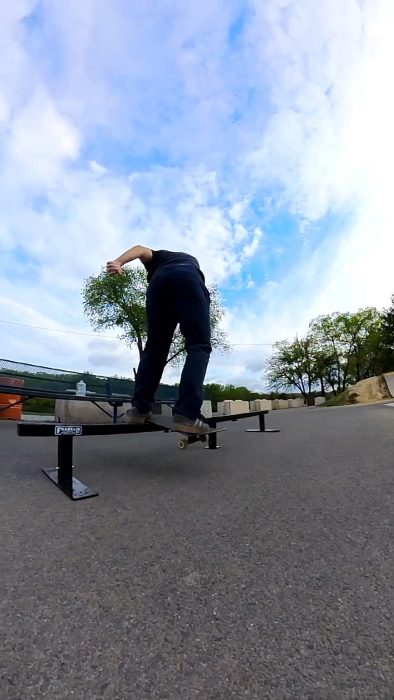
For my first session, I noticed that it worked well for sliding, but the rail sections had some noticeable gaps that I would feel when I was trying to grind the rail. This is the rail’s first (and largest) con: having multiple sections, you build means this is not one seamless piece with a seamless feeling grind. You feel each section as you grind over it.
I wound up just dialing in my boardslides and ultimately purchased deck rails to help that feel even smoother.
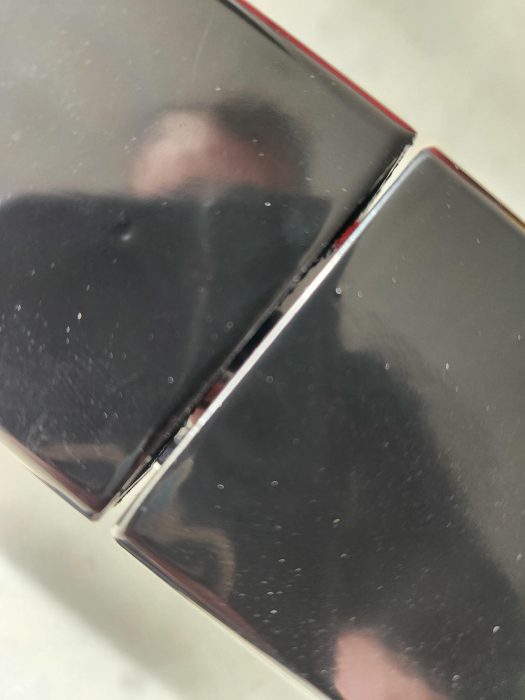
Once I got the rail home, I stared at the edges of each section and began to brainstorm how I could make them smoother. Ultimately, I decided to take a file and smooth down the corners of each section. They were jagged, sharp, and didn’t line up perfectly to either side. I figured making each section’s corner a bit more rounded should help, and ultimately, it did, but there are still gaps in each section that I feel as I grind. I haven’t found a perfect solution to that, so it is the first thing I will mention in the cons section below.
Pros:
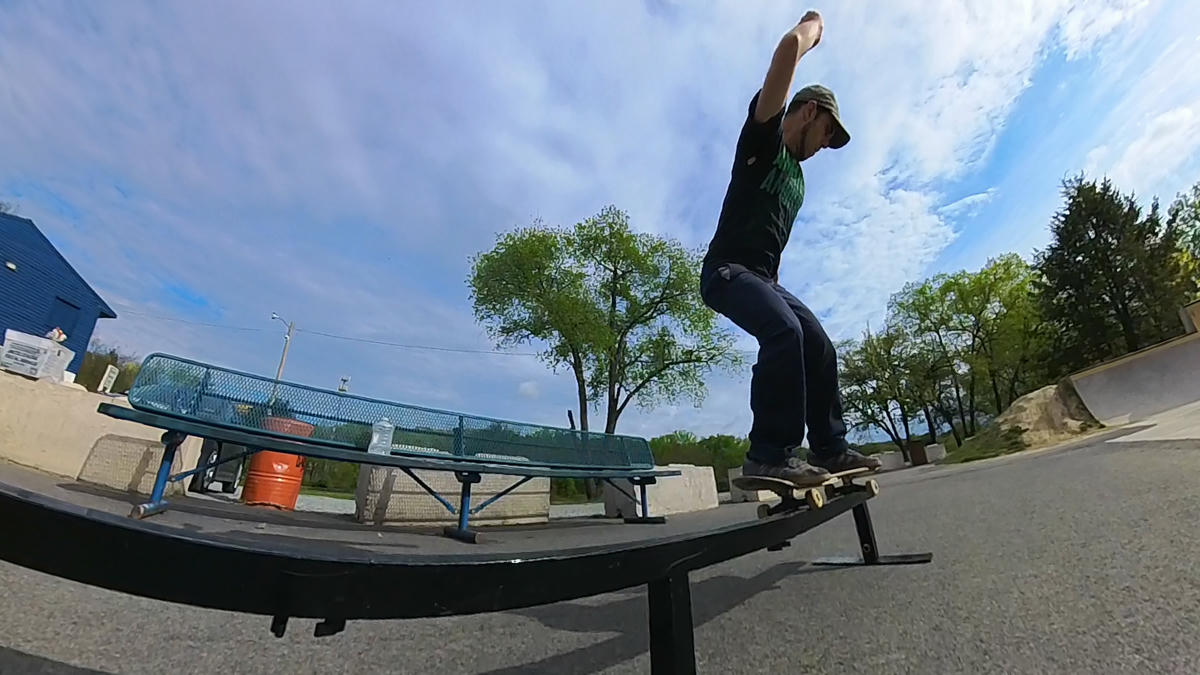
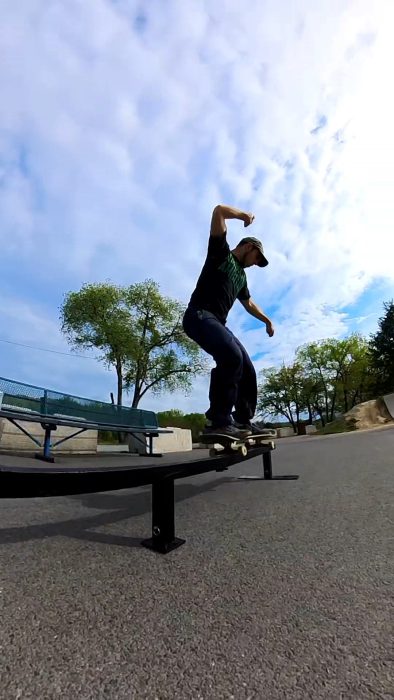
- It is 9 Feet / Practice Holding Slides: The nine-foot length is a game changer. Most portable rails are only six feet. The extra three feet make a difference because you get practice holding your slides longer. (And by the time you hit a six foot rail from the side, you pretty much bonk it, and you’re off.)
- Height Adjustability Between 10 – 14″: I love the low-to-high adjustability settings. You can easily warm up in the low setting and increase it as your legs get warm.
- Light Yet Sturdy: The entire rail is only 38lbs, so it’s surprisingly lightweight, but it still holds up. It has rubber feet that do a really good job holding it in place as you hit it, too. Some of the lightweight rails slide all over, but this one stays put.
- Fits in the Trunk In a Duffle Bag: This rail comes with a travel bag, and being that it breaks down into three-foot sections, it can easily fit in the trunk of your car.
Cons:
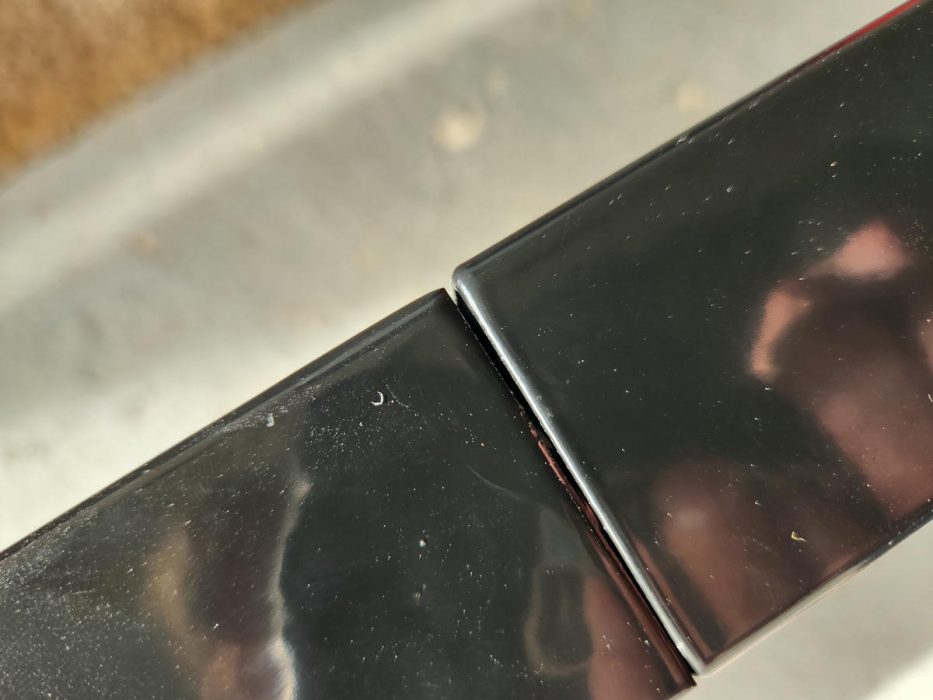
- Gaps in Each Rail Section / It Doesn’t Feel Like a Seamless, Smooth Grind. There are noticeable gaps between sections of this rail due to it not being cut or filed down to align perfectly. While it’s not a dealbreaker, you can feel them when grinding, and trucks tend to catch. It’s fine for boardslides but noticeable for some grind tricks when your weight is completely on top of the rail (5050, 5-0, or nose grinds).
- Soft Metal Easily Gouges / Requires Maintenance: The metal feels a bit softer than I’d like. It’s light, but it’s not as durable as something like steel. I’ve noticed the Kingpin digs in, and I had a loose screw on the deck rail, causing some issues. You’ll probably need to file down the gouges to keep it smooth.
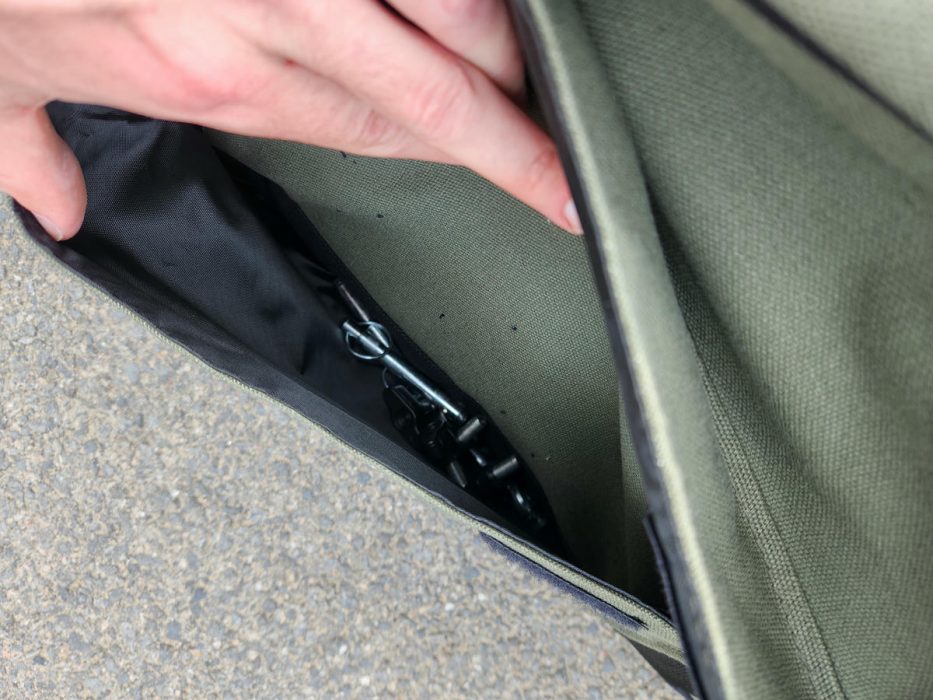
- Lots of Small Parts to Keep Track Of: This rail has three main sections, three feet that pair with those sections, three ball pins to hold the feet supports, and four thumb screws. It can be difficult to make sure I have all the screws and pins that go with it, so I started to keep a plastic bag in my trunk to make it easier to keep them all together.
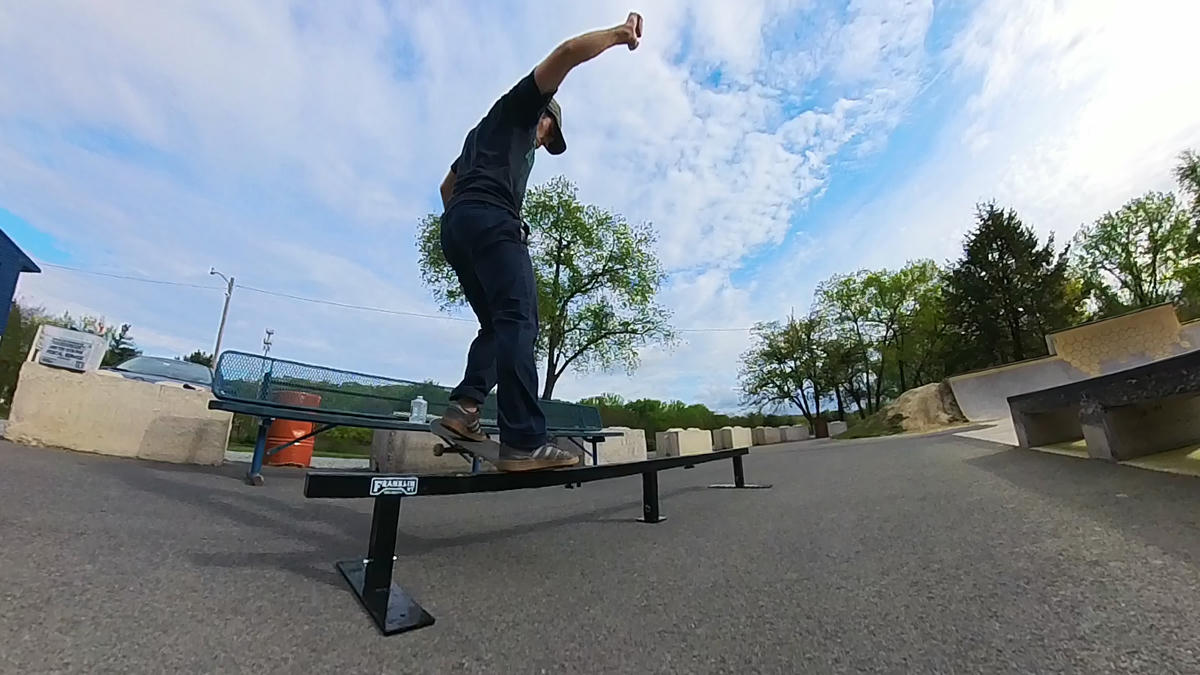
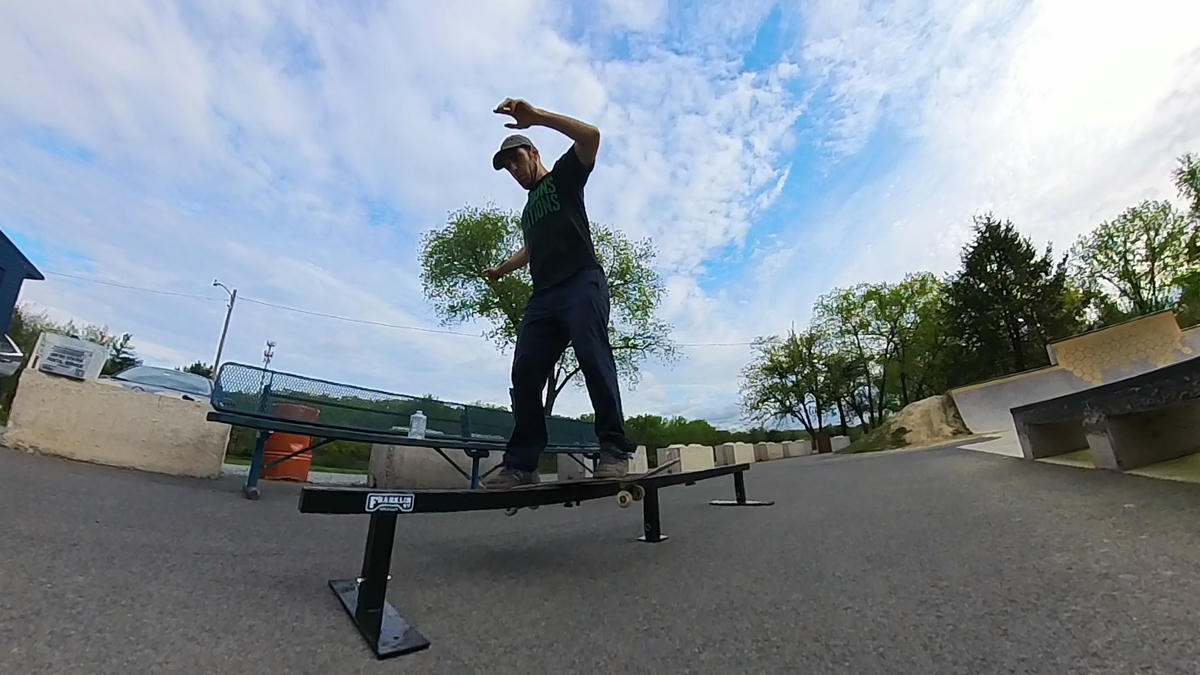
So, How Does it Skate?
Here’s a short video edit of me skating the Franklin St rail.
@boardoftheworld I turned 42 yesterday and feel so freaking lucky that I am able to still skate and ride. Even if youre not in the shape you used to be, get out there, shake the dust off, and keep it moving.
It skates well, but the main note are those gaps in the three foot sections. That gets really annoying, really fast. For some reason, the quality control (at least on my rail) didn’t take a close enough look at how well each of the rail sections align, so whenever I go to do a grind where my weight is directly on top of the rail (5050, 5-0, or nose grind), I feel the gaps as I grind across. It trips me up. I don’t notice those gaps as much while doing slide tricks or even feeble grinds. It’s just when I am standing on the rail with the majority of my truck needing to pass over the gap.
I mentioned above in my first impression section that I filed down the corners of each section to round them off. That helped immensely, but I still feel the gap. The next workaround I am considering is to put something inside of the gap, like a zip tie. If that doesn’t work, I might even just add some Steel Stick to bond two out of three sections and just put my feet down to travel with one six-foot section and assemble the last three at the spot.
The Length and Convenience Are the Real Highlights Here
The fact that this is a 9-foot rail and not a 6-foot rail is definitely one of the standout features here. It feels like you have plenty of room to commit to longer slides without feeling cramped, especially if you’re working on holding your trick.
I wound up adding deck rails to my setup to make the gaps feel less noticeable, and with that added, board slides feel really smooth. I don’t notice any friction while sliding now. (It’s just some grind tricks.)
After the extra length, it’s nice to be able to just leave this in my trunk and take it out whenever I want to.
Durability and Materials
While the rail is really lightweight, it does come at the cost of durability. The metal feels softer, almost like the Element flat bar (which I am now on my third one due to the legs breaking off).
The softer metal isn’t a dealbreaker for me, but you’ll notice it if you’re used to something like a steel rail. I’ve had some gouging issues from my truck’s Kingpin digging in and leaving a nice gouge. I also had a loose screw on the deck rail that gouged the rail.
After a few sessions, I realized that I needed to file down the gouged scratches to keep the surface of the rail smooth. If you maintain yours, you’ll be all set.
Will it last forever? No, probably not for an adult skating it every day. I do think the build of the legs will far surpass the Element rail. However, it’s ultimately the rail’s slidability that I see going first. With all of the kingpin gouges, there’s going to be a time when I am going to need to wax the heck out of this just to get it to slide (and if that’s the case, just go hit a parking block instead).
It’s clear that this rail is made for portability more than it is for heavy-duty, long-term abuse. I wouldn’t expect it to hold up as long as something made from steel, but if you’re looking for a rail to skate casually or throw in the trunk without worrying too much about weight, it gets the job done.
What I Like About the Franklin St. Flat Bar
I like how portable this rail is. It’s easy to take to spots, and that’s a huge plus for me since I don’t have access to a lot of skateparks here in North Eastern Pennsylvania. Having a skaterail that I can take anywhere is a plus.
I love that it’s 9 feet.
I also like that it’s neatly contained in its bag.
I like that it’s often on sale for $160 (making it on par with the cheaper cost of the Element flat bar).
What I Don’t Like About the Franklin St. Flat Bar
The biggest downside for me is that it doesn’t grind as smoothly as it should with the gaps and softer metal used. The gaps are not huge, but they’re enough to mess with your grind and add an element of danger you really shouldn’t have with a rail you buy to practice on.
Overall Rating of the Franklin St. Packable 9ft Flat Bar Skate Rail
| Grinds | 3.00 | 5.0 |
|---|---|---|
| Slides | 4.00 | 5.0 |
| Durability | 3.75 | 5.0 |
| Easily Portable | 4.75 | 5.0 |
| Fun Factor | 4.50 | 5.0 |
| Overall Quality | 3.50 | 5.0 |
| Total Review Score | 3.92 | 5.0 |
Editors Rating: 3.92 out of 5.0 stars for the 9 Foot Franklin Street Rail.
Image Gallery from Review

Would You Recommend the Franklin St. 9ft Flat Bar?
It depends on why you would want it for.
If you want this to get better at a certain grind trick, I’d say no, and just consider getting a one-piece rail rather than one in sections. If you can afford it, go with the Transformer rail.
If you’re looking to improve slide tricks and just want something that fits in your car’s trunk, then definitely give it a go. It’s not that it doesn’t grind smoothly, it’s just that a rail without multiple sections feels like one continuous grind where this doesn’t.
Yeah, I would recommend this rail if you’re looking for something portable, fun to skate, and easy to move around. It’s perfect for skaters who need a simple, adjustable rail for grinding on the go. The build quality could be better, especially when it comes to the material choice and the gaps between sections, but for casual use and portability, it’s a solid option. It’s not built to last forever, but for the price and convenience, it’s a solid investment if you’re looking for something that’s easy to store and take with you.
How to Build the 9Foot Franklin Street Skate Rail
You basically have three sections, and their feet line up in them. The entire thing can be assembled in less than five minutes.
Here is an easy-to-follow description of how to build the Franklin St. Packable Rail:
- Pair every rail section to its support.
- Attach the supports to the rails’ leg.
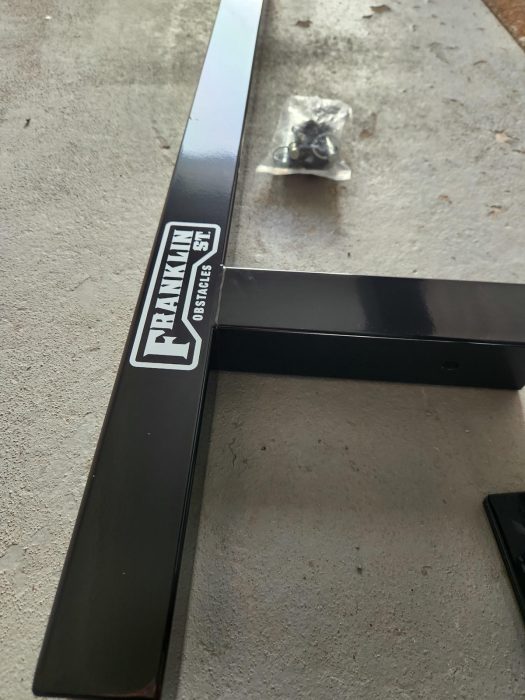
- The smallest, T-shaped support without extending feet is the middle support.
- The end supports go at the ends. These have a wider base.
- Note that the supports have gummy bottoms to keep the rail from sliding around.
- Connect the sections of the rail together. You will find the inner circle section (that extends from each rails’ section) and pair it with the square section (outer), sliding it in. Slide the end section in as well.
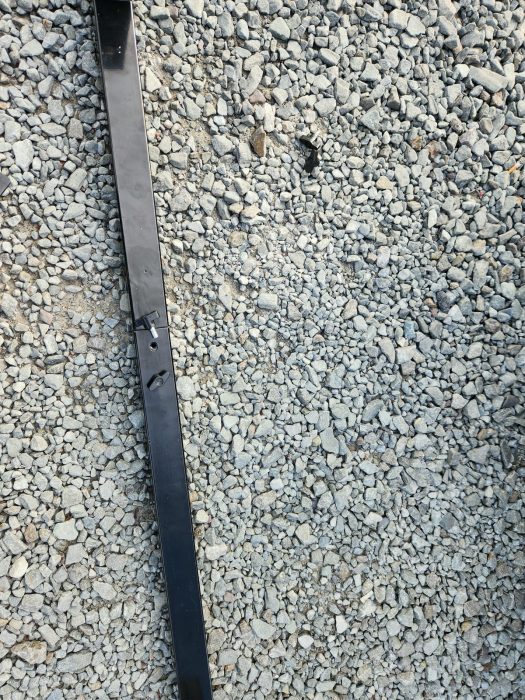
- To keep the rail all in one piece, you will find the thumb screws and two holes in each section (four altogether) on the bottom of the rail where these screws go in. Screw both thumb screws in for both outer section sections.
- To adjust the rail’s height, find the ball lock pins that go into the pre-drilled holes in each support leg. You simply put the pin into the hole setting that you want the height of the rail to be.
And you’re all set to skate it.
Where to Buy a Franklin St Rail
You can find this rail on Amazon here.
Steve Weber is the passionate snowboarder, skateboarder, and author behind Board of the World. He understands that most gear reviews focus on having the perfect snow conditions, but his testing methodology is different. Living in Pennsylvania, Steve describes exactly how a board performs when the conditions aren’t perfect. His reviews cover performance on ice, hardpack, and flat-out brick conditions. In other words, he reviews boards for the conditions that East Coast riders actually face.
Bringing 27 years of East Coast snowboarding and 21 years of skateboarding experience, Steve is a 42-year-old intermediate park rider. His recommendations are informed by decades of battling icy conditions, ensuring every review accounts for the board’s performance on the roughest of terrain.
For the last five years, Steve has poured his passion into writing in-depth, unbiased reviews that help riders make informed decisions about the gear they’ll use. He also works part-time at a snowboard shop in Northeastern Pennsylvania, which gives him a direct line to learning about the new gear tech months in advance. When he’s not writing reviews, Steve is often found riding at Montage Mountain and testing out new boards.
Steve’s goal with Board of the World is simple: to help every reader find the right gear so they can have fun outside from the first time they use it.